Setting Up OSC Apps for the Heart Rate Prefabs
We recently released the Glowy Heart Rate Prefab, and to work correctly, it requires receiving specific parameters from OSC apps.
- HR (Int): required to display your heart rate.
- isHRBeat (Bool): required if you want the prefab to stop showing on your avatar when heart rate data isn’t being received for some time.
The easiest way to get these parameters working is Pulsoid OSC, a feature built directly into Pulsoid Desktop. It sends both parameters automatically, with no separate app to install. In this article, we’ll start with that setup, then cover how to configure other OSC apps in case you’re already using one.
Setting Up Pulsoid OSC (Built Into Pulsoid Desktop)
Pulsoid OSC is the fastest way to get your heart rate prefab working. It’s built directly into Pulsoid Desktop, so there’s no separate app to download or authorize. Once your heart rate device is connected to Pulsoid, here’s how to turn it on:
- Open Pulsoid Desktop and connect your heart rate monitor.
- Turn on the OSC toggle (right side).
- Launch VRChat.
That’s it. Your prefab starts receiving the HR and isHRBeat parameters automatically, with no parameter renaming needed. Pulsoid OSC also lets you customize chatbox messages and avatar parameter paths if you want to go beyond the default setup. See what Pulsoid OSC can do, or follow the full setup guide for a step-by-step walkthrough.
Pulsoid OSC is available on the BRO plan. If you’re on a different plan or prefer a standalone app, keep reading below for PulsoidToOSC and other OSC apps.
Setting Up PulsoidToOSC from the Beginning
If you’d rather use a free standalone app instead of the built-in OSC feature, PulsoidToOSC is a good choice for quickly sending heart rate data to VRChat. Before we go further, make sure your Pulsoid account is set up and you have the supported heart rate device. Not sure how? Check out this article (1-3 steps).
Here’s how to set the PulsoidToOSC:
- Install the PulsoidToOSC app (click on the PulsoidToOSC.zip)

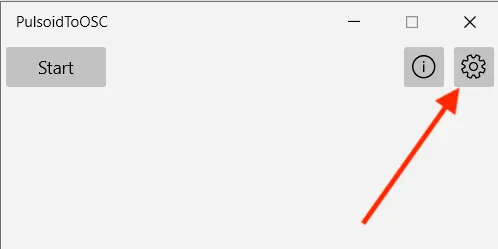
- Open PulsoidToOSC and go to the Settings
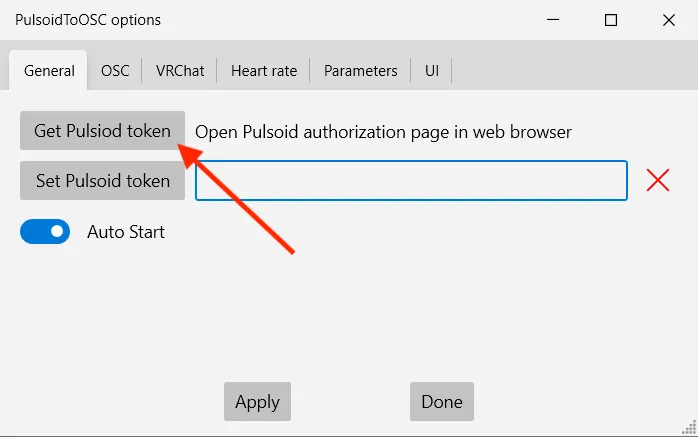
- Click on “Get Pulsoid Token” and authorize Pulsoid.
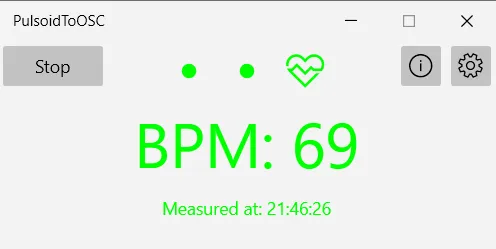
- That’s all! If you’re wearing your heart rate device, you should be able to see your heart rate in the app. Click “Start” to start sending heart rate parameters to VRChat.
OSC Apps That Work Without Changes
Some apps already use the correct parameters out of the box:
- Pulsoid OSC (built into Pulsoid Desktop, no extra app needed)
- TTS Voice Wizard
- PulsoidToOSC
- HRtoVRChat_OSC (no longer supported)
Note: TTS Voice Wizard does not send the isHRBeat parameter. This means you won’t be able to use timeout detection with the Heart Rate Core Prefab if you’re using that app.
Setting Up MagicChatBox
MagicChatBox already uses the correct parameter names (HR and isHRBeat). The only thing you need to do is enable OSC output so that the data is sent to VRChat:
- Open MagicChatBox settings.

- Locate the Pulsoid to OSC section.
- Enable OSC support.
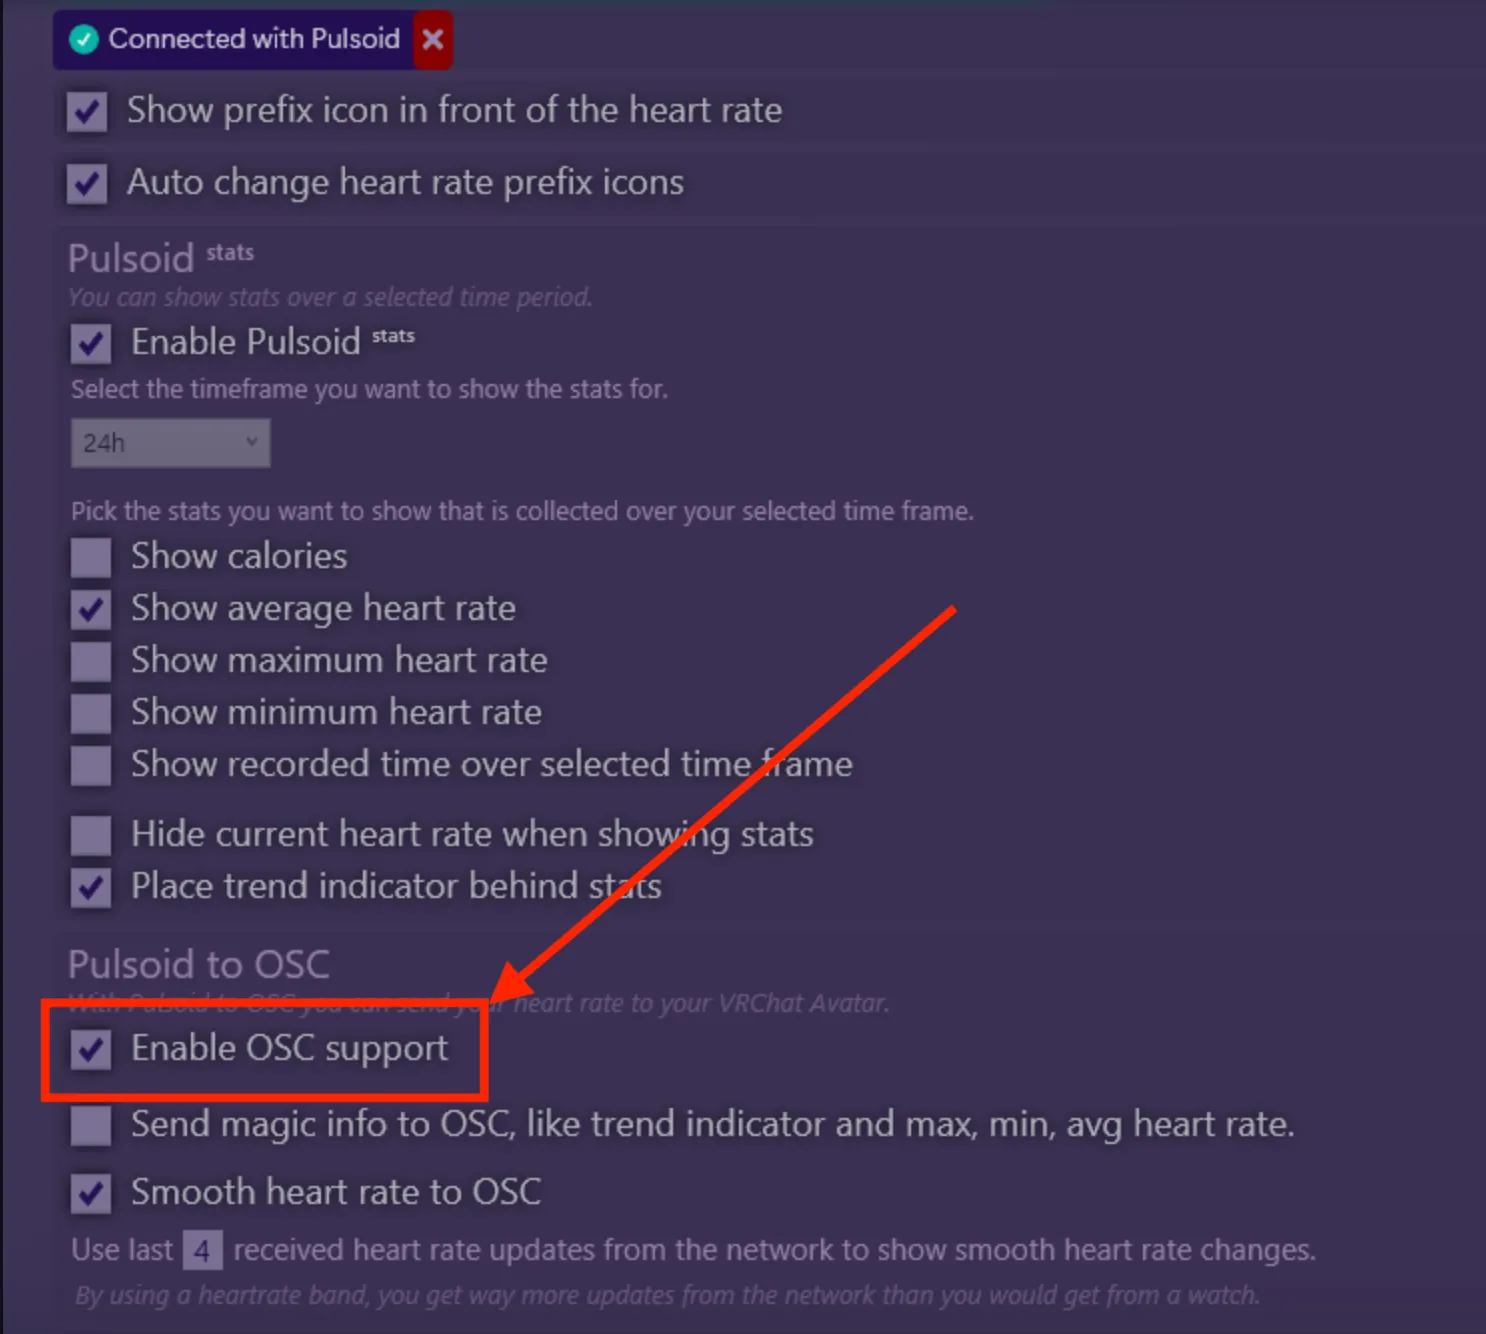
No renaming is required: once enabled, your prefab will receive both parameters correctly.
Setting Up VRCOSC
VRCOSC includes the needed parameters, but the default names are different. To make it work with the prefab:
- Go to the Modules tab.
- Locate Pulsoid and click the Link icon.
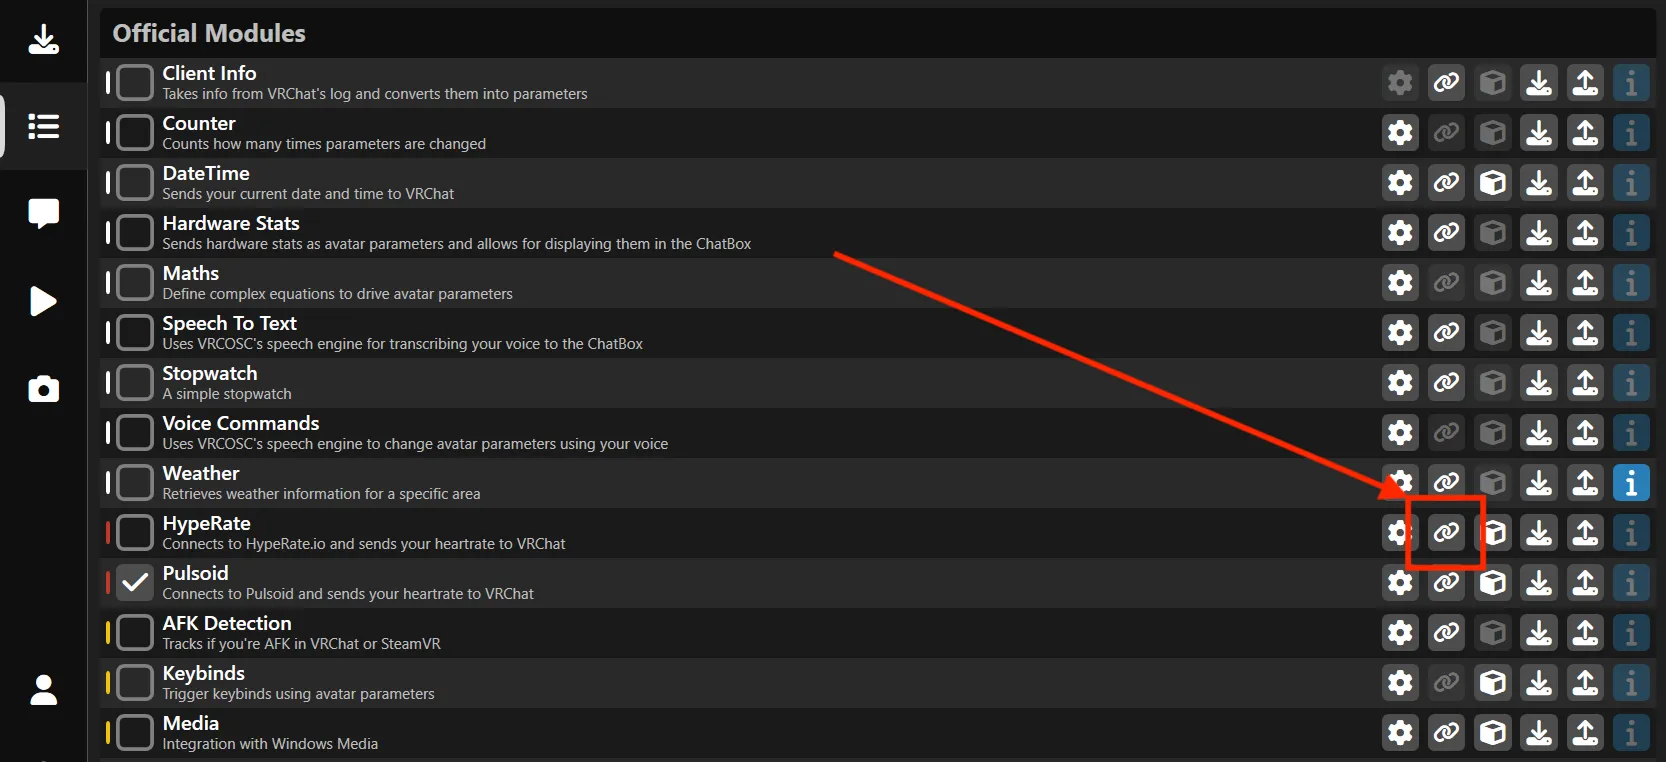
- Update the parameter names as follows:
Change VRCOSC/Heartrate/Value → HR (just HR, without the VRCOSC/Heartrate/ part)
Change VRCOSC/Heartrate/Beat → isHRBeat (just isHRBeat, without the VRCOSC/Heartrate/ part)
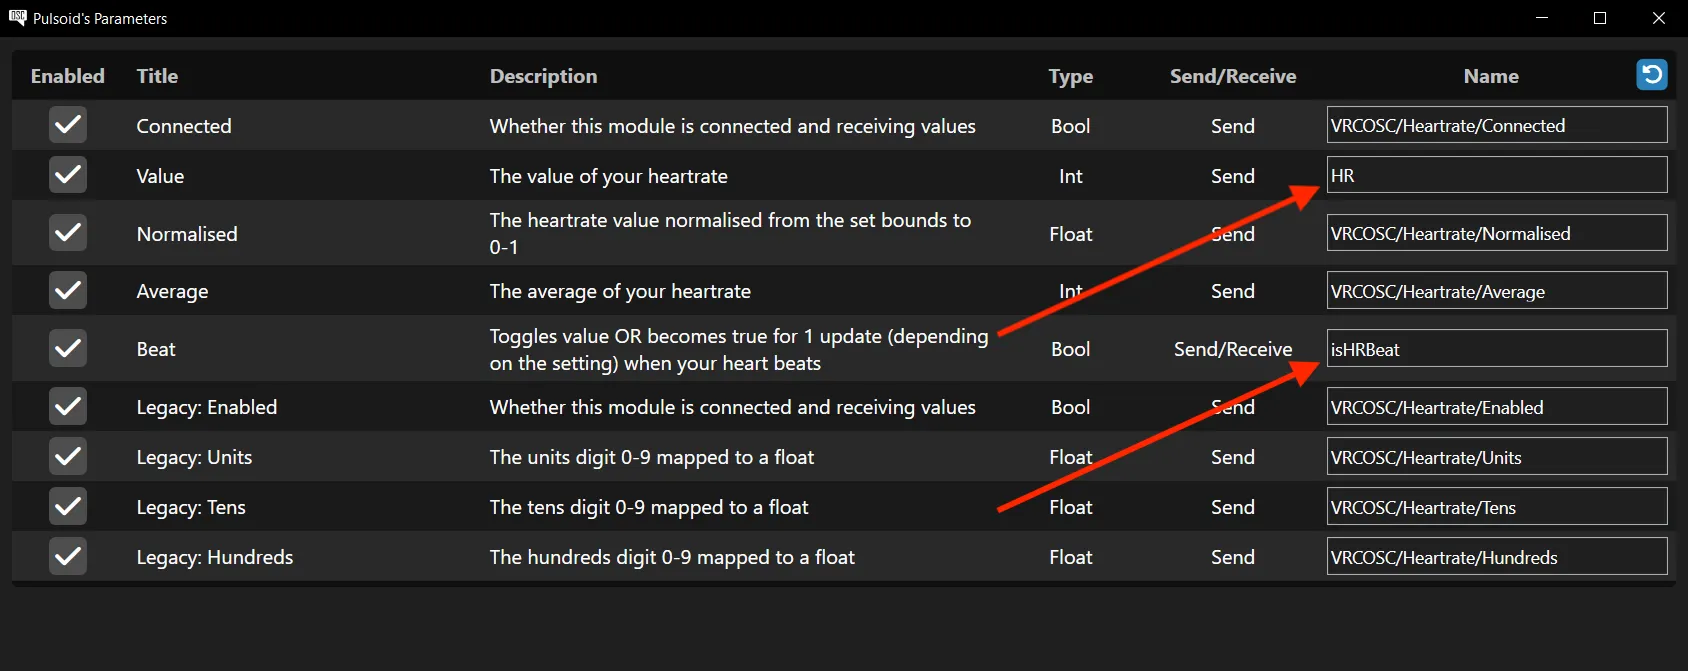
Save your changes. After this, VRCOSC will send the correct parameters for both heart rate display and timeout detection.
With the correct setup in your OSC app, the Heart Rate Prefab will work seamlessly, showing your heart rate in real time and automatically hiding if data stops coming in (in case you’ve added the Heart Rate Auto-Hide prefab).